
Chilipeppr Free Software for TinyG
Price
Chilipeppr Free Software for TinyG
Product Description
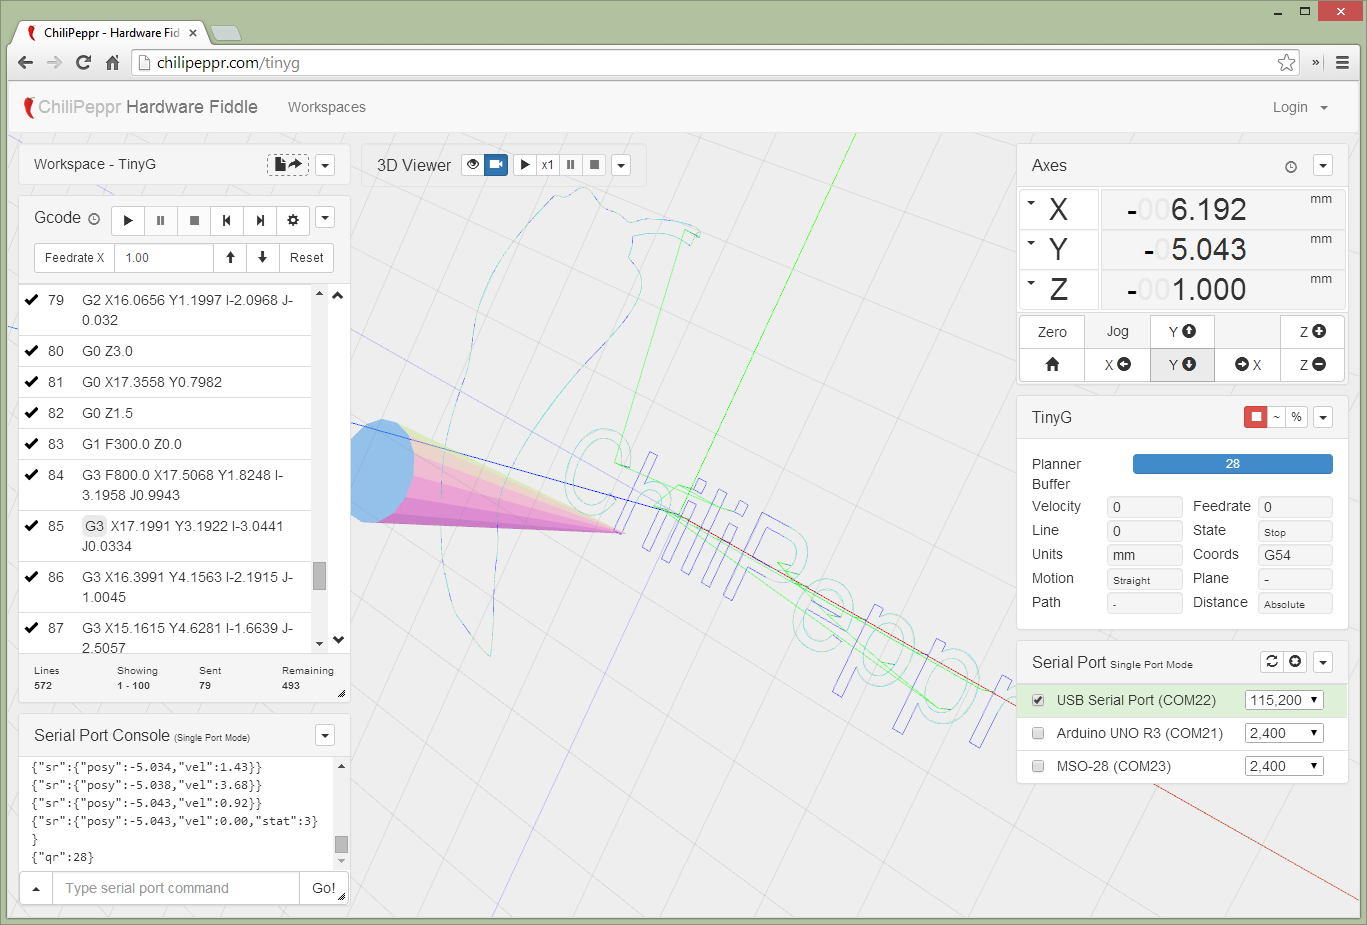
A Browser based TinyG UI
Chilipeppr represents a modern way to do CNC software control for the TinyG motion controller.
Download Wiring Diagram here:
[Download not found]
Features
- 3D Viewer
- Gcode Sender
- TinyG internal stats viewer including planner buffer
- Flow control via planner buffer
- Serial port JSON server that runs on your Windows, Mac, Linux, or Raspberry PI
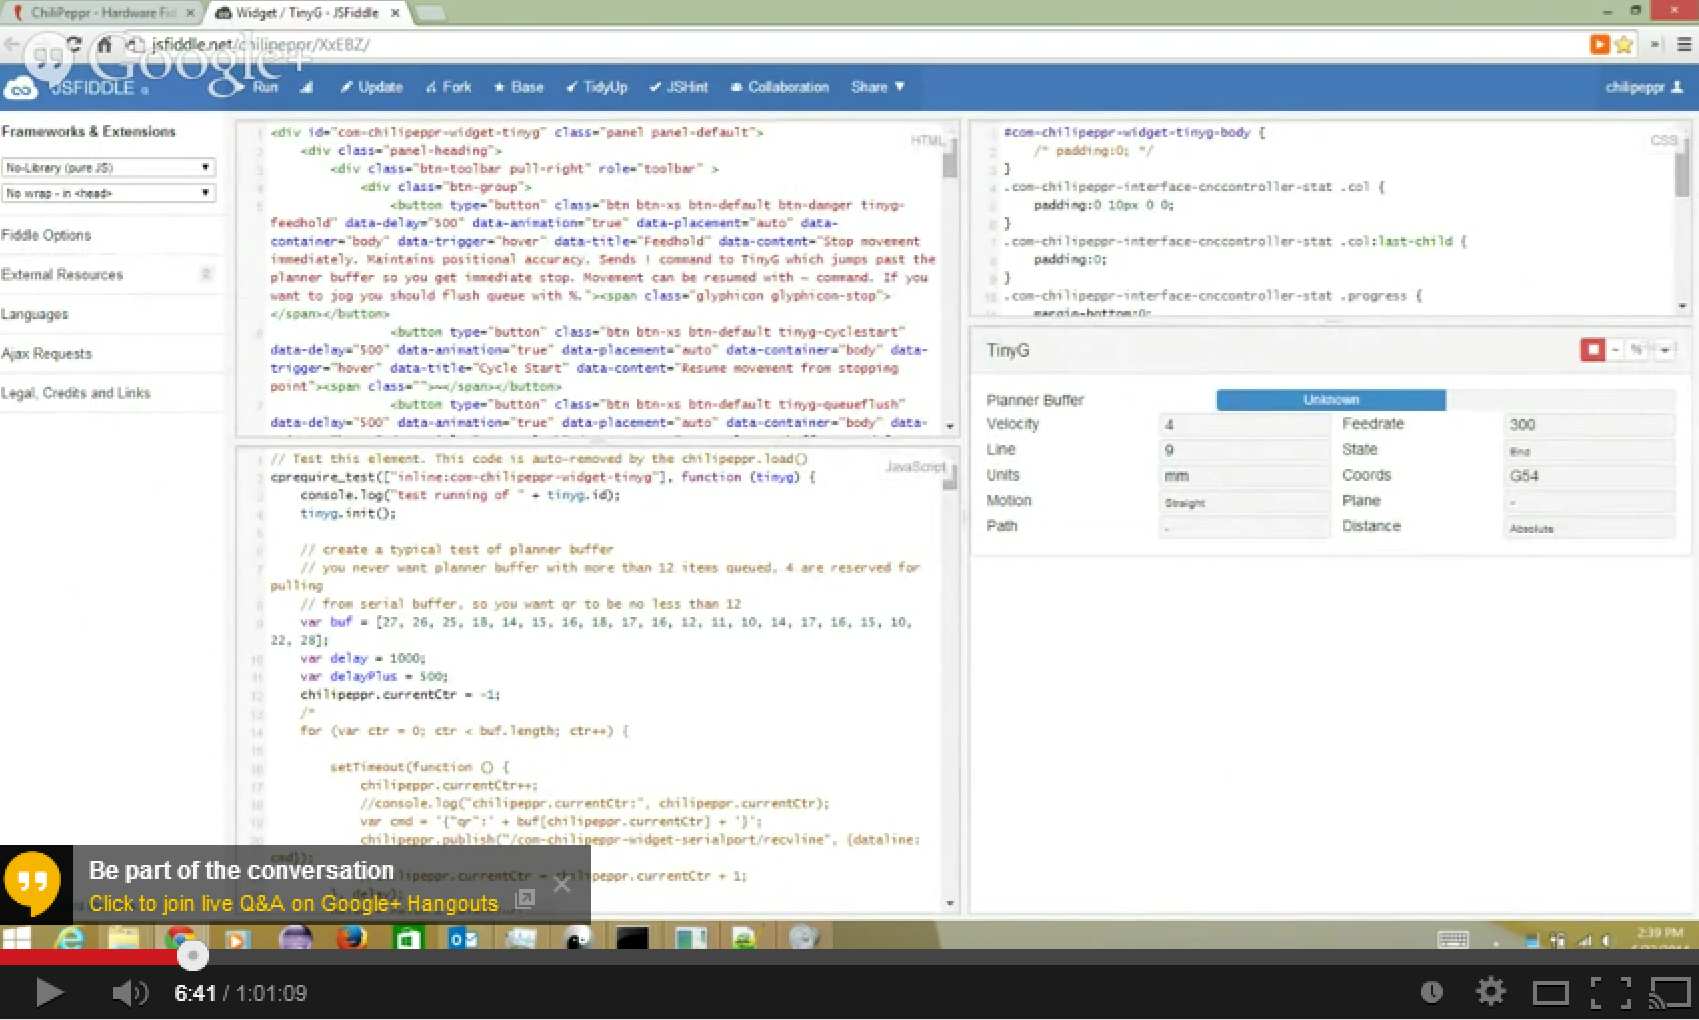
- Fork any widget or entire workspace to modify/add your own via JSFiddle
All open source. Have fun.
Getting Started
- Just load the TinyG workspace in ChiliPeppr in your browser. Chrome works best. Firefox is decent. Safari doesn't support WebGL so the 3D Viewer doesn't work. IE won't allow local websockets. chilipeppr.com/tinyg
- Download the Serial Port JSON Server (SPJS) from inside the "Serial Port Widget" in lower right. If you're on a Mac you'll have to build SPJS by following the Readme on the Github page. Linux/ARM/Raspi/BeagleBone/Intel Edison/Windows all have pre-built binaries. Edit: A pre-compiled SPJS for Mac 64bit OS is now available for download(as of 17Feb2015)
After installing the pre-built binaries, or building on the Mac, you need to understand that ChiliPeppr is a browser app but it needs one tiny app running on your computer. This tiny app is a Serial Port JSON Server or AKA SPJS. This is just a fancy way of saying you need a program running on your local machine that translates serial communications with TinyG to the websocket format. You can use SPJS over the network or via your localhost. Currently, there are Windows, Linux, Raspberry Pi, Intel Edison, and BeagleBone Black versions of this server available for download inside ChiliPeppr. For Mac OS X you'll need to build it. Once you have downloaded and launched SPJS we are ready to move on.
FYI: Here's a tutorial to get Go installed on a mac: http://www.cyberciti.biz/faq/installing-go-programming-language-on-mac-os-x/
Loading ChiliPeppr
Go ahead and load up http://chilipeppr.com/tinyg in your browser. This will bring up the official TinyG workspace for the ChiliPeppr interface.
Sending Files
Video walkthrough of the ChiliPeppr Hardware Fiddle - TinyG Workspace.
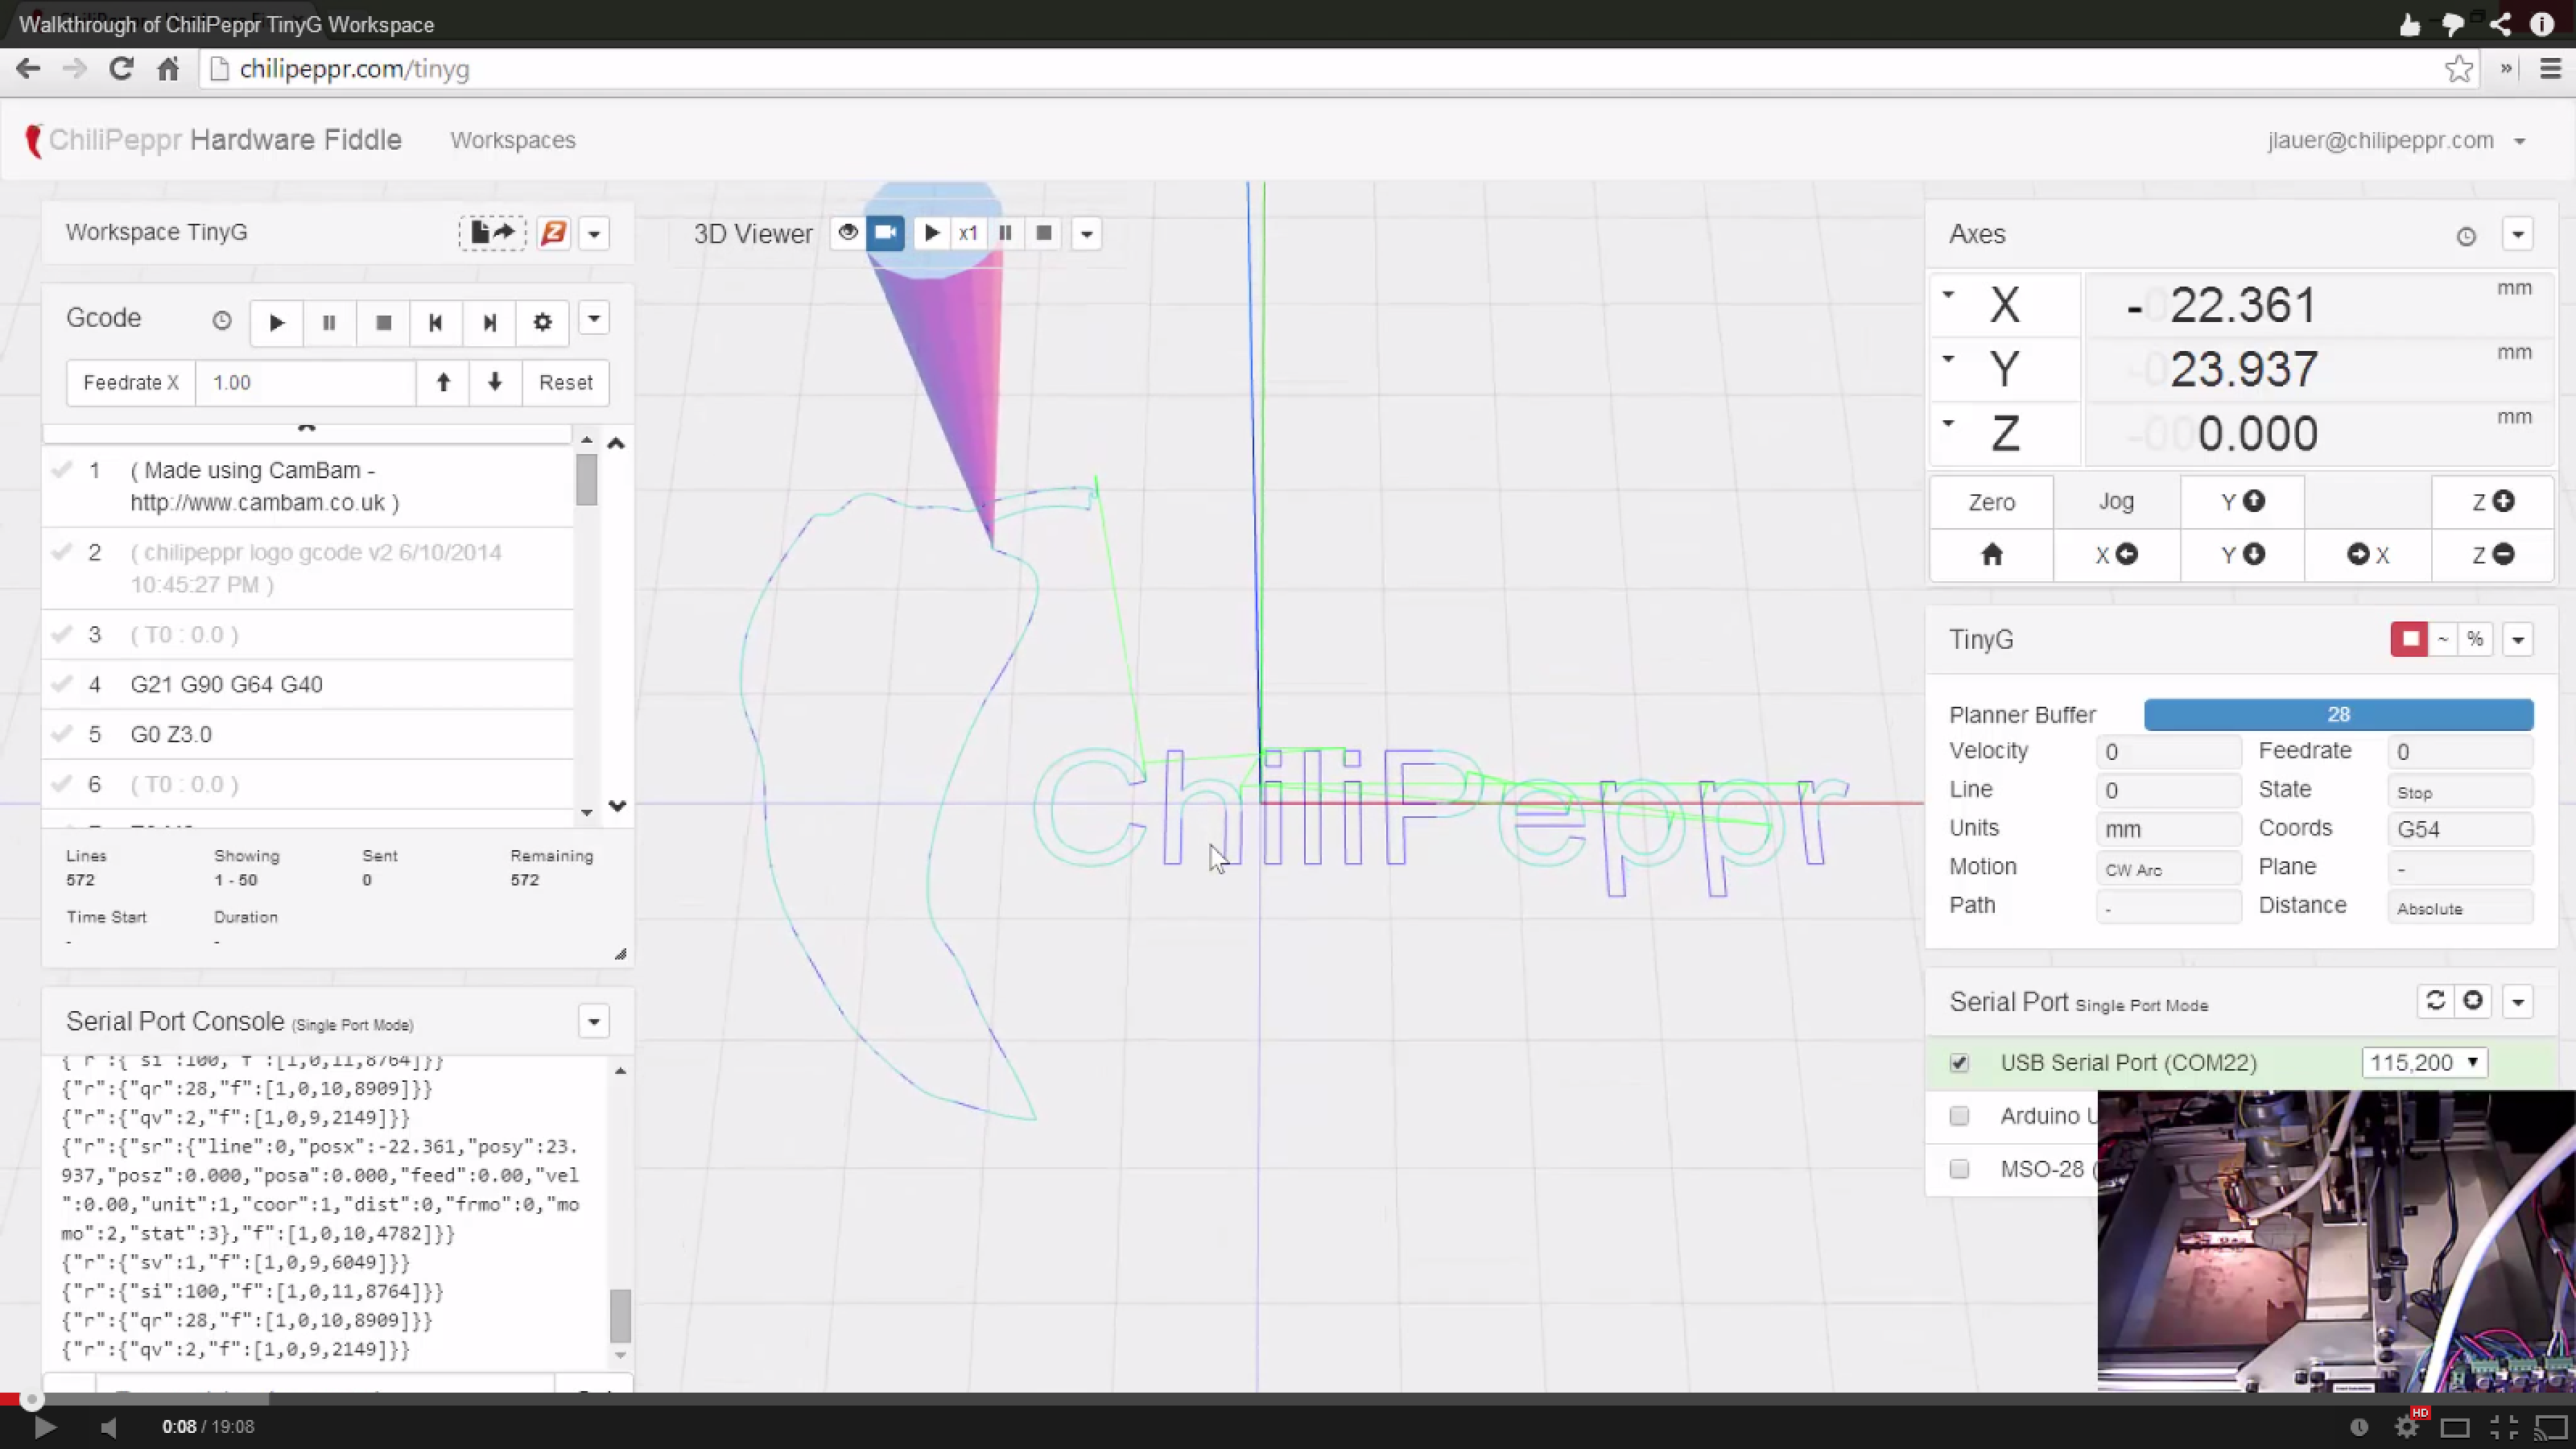
Please note that SPJS currently maxes at 25,000 lines. Most Gcode files aren't this long, so this is unlikely a problem right now. Future modifications will implement throttling in ChiliPeppr to avoid the overflow. For now, just send your lines slow enough to not overflow the 25,000 line buffer. You can adjust the throttle in the settings button of the Gcode Widget. Send around 25 lines at a time each 1 second (1000 ms) depending on the complexity of your Gcode.
Issues Tracking
https://github.com/chilipeppr/tinyg There is a Github project that is available for tracking issues. Please open a ticket here if you find a bug.
Community
There is a ChiliPeppr Google+ Community for posts and discussion. This community is fairly active. https://plus.google.com/communities/104346367498010042037
There is also a ChiliPeppr Google Group where you can submit bugs, ask questions, or discuss. https://groups.google.com/forum/#!forum/chilipeppr
Forking Chilipeppr
- Step 1. Pick a widget that you want to modify. Pick "Fork" from the upper right menu of the widget. Save your widget in JSFiddle and note the new URL.
- Step 2. Fork the workspace by choosing "Fork" from upper right menu of the workspace title area. Modify it to point to your new forked widget from Step 1. You'll have to look around inside the code and find where the chilipeppr.load() methods are and change the URL from the old widget to the new one.
- Step 3. Fork the boot Javascript by choosing "Fork Boot Javascript" from upper-most right menu in ChiliPeppr (just to the right of your login name). You must be logged in to do this step. Pick a new URL for your workspace. Modify the sample boot Javascript to point to your workspace that you created in Step 2.
- Done. You should now be able to view your newly forked workspace.
Video Tutorial of Creating a Hello World Fork
Offline Chilipeppr
Updates: offline available here https://github.com/pistolero/chilipeppr-offline
For those of you who want to run ChiliPeppr offline, here are some strategy ideas to achieve this. ChiliPeppr is dynamically pulling all of the widgets/elements from JSFiddle's or other code sources across the Internet. For instance, the 3D Viewer pulls roughly 10 different Javascript files from different CDN networks. To create an offline version you would have to pull down locally each Javascript file and each JSFiddle and perhaps host your own web server. You would have to scan through all of the code and repoint the Javascript files to your local server. This can be achieved, but would just require somebody to write a script that did all of the redirecting.
- You could visit ChiliPeppr.com and load the workspace and then disconnect from the Internet. As long as you never reload you should be ok. It is likely you will need to reload at some point, so this is a short-lived solution.
- You could setup a local proxy on your computer using Charles. http://www.charlesproxy.com/. You could then load the workspace from ChiliPeppr.com, open the developer console, and copy the HTML content of the DOM. You would have to setup a web server on your localhost and serve up that page from http://localhost. Then you'd have to watch your the Charles Proxy UI to see what URL's are being requested by your browser and where they fail. Then go retrieve that file manually and make a local copy. Then create a mapping for that file in Charles Proxy. After working through all dependencies you should be good to go.
- ChiliPeppr uses Require.js to load all Javascript files so you could create a remapping inside the app.js or require.js file that is used as part of ChiliPeppr. You would overload the chilipeppr.load command as well as the require.js require() method.
Additional Details
 Updating...